
Today’s blog post comes from Jaison Antoniazzi, a 20+ year OpenEdge expert from Brazil and author of two books in Portuguese on OpenEdge.
Jaison has embarked on an ambitious project for 2022: 365 days of Progress OpenEdge development tips, which he is sharing on LinkedIn!
Tip #3
Set up AppBuilder or Developer Studio, it is your choice.
First, Iif you do not have the shortcut to develop with Progress OpenEdge, please check the Tip #1 and Tip #2 to set it up.
GUI Procedure Editor or AppBuilder
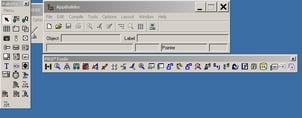
When opening the program _desk.p or _edit.p (desktop and GUI Procedure Editor, respectively), you should open the AppBuilder, which can be seen as a button in _desk.p or accessible from the Tools menu of the GUI Procedure Editor or the Desktop program (_desk.p).
If AppBuilder didn't appear, your license probably doesn't have the OE Studio component or Progress Dev Studio OE and you need those to continue from here.
The next image shows our objective:
With the AppBuilder open, we will need to locate the component palette. It is usually on the left side of the AppBuilder entitled Palette:
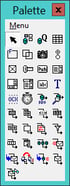
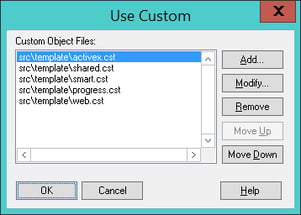
Now access the Menu option in this palette to reveal Options, Use Custom and Add OCX. Welect Use Custom, which will open a window for us to add CST files to customize the available components in AppBuilder. CST files are nothing more than text files with some information - such as path, component type and its label - in a pattern understood by AppBuilder:
AppBuilder is old school. What if you don't want to use the GUI Procedure Editor or AppBuilder, and want to use Developer Studio?
My answer is, YEAHHH!
Setting up Developer Studio
We will still need the c:\develop folder, but we will not need the INI, PF and program files, because some of the AVM settings for Developer Studio we will provide in the project that will be created.
So, my c:\develop folder is only with the c:\develop\database folder with the Sports2020 database created in TIP 1, nothing else.
Let's open Developer Studio.
When executing the shortcut in the Microsoft Windows menu, the workspace selection popped up for me and I entered c:\develop:
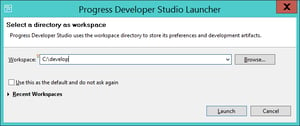
After a few seconds this window displayed:
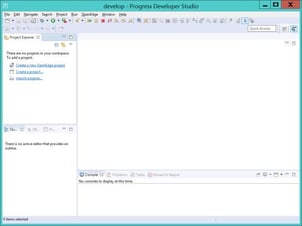
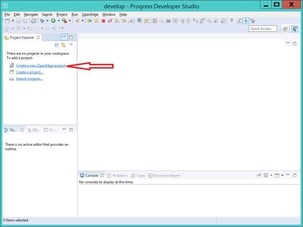
We need to create a project to start the development. Select Create an OpenEdge project:
When this window appears, choose the General option and keep OpenEdge Basic. In the Project name field I entered OpenEdgeTips.
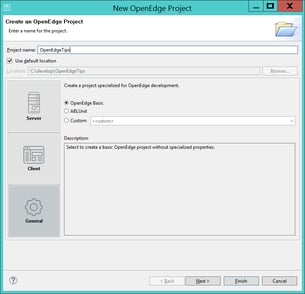
Click the Next button.
On the Select AVM and layout options page I haven't changed anything.
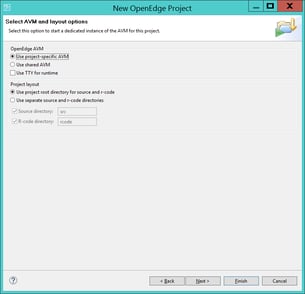
Select the Next button again.
On the Define Propath page you can enter the folders you need. In my case I didn't make any changes.
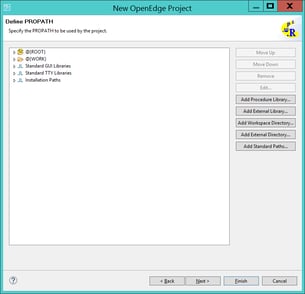
Again, use the Next button.
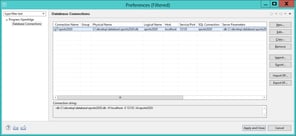
We get to the Select database connections page, please select the Set database connections link.
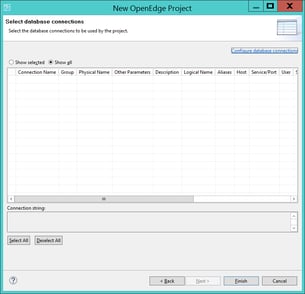
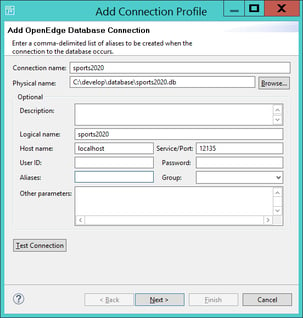
Enter the parameters for connecting to the database:
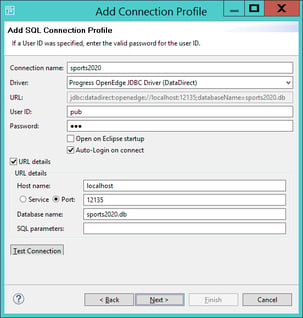
Proceed to the Add SQL Connection Profile page, here we will use the pub user with the pub password from the previous tip.
Clikc next and we will get to the Define Database Server Setting page:
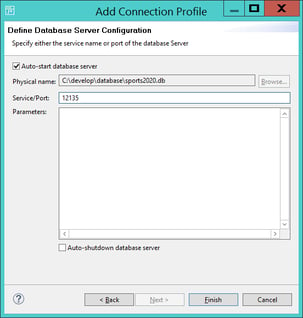
This page is useful for loading the database in case you have not registered the sports2020 database in the OpenEdge Explorer or Management Console, see Tip #2 to learn how to register database for autostart.
This is our setup for the Sports2020 database:
Select the sports2020 database and complete the database selection.
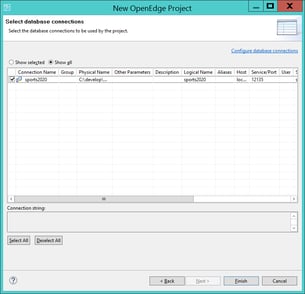
And we arrive here:
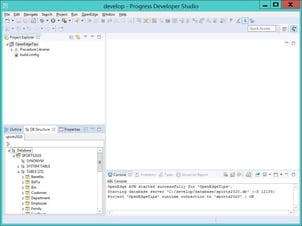
If there is a connection error with the OpenEdge database SQL layer, the list of databases on the DB Structure page will not be displayed and several connection errors will be shown during development. If you have any problems, please contact me. It will be my pleasure to help you.
That's it for today, folks!